


Node.js is a standalone engine used for creating JavaScript based web applications. It is a run-time environment and library built with V8 which is Google’s open source, high performance JavaScript engine. Many Node.js applications function as a web stack wherein any traffic to or from the internet at large is piped through a proxy of some kind, such as Nginx or IIS.
Here, I cover how we can install Node.js on Windows Server 2008 R2, and thus have JavaScript run on the server. I found it quite difficult to find a great tutorial for properly setting up Node.js on a Windows 2008 R2 Server. After playing around with this for a while, I was able to succeed with the installation. I thus hope this article will be of help to you if you find yourself in a similar situation.
So here we go. We’ll first check out the system requirements for installing Node.js on Windows 2008 R2 server.
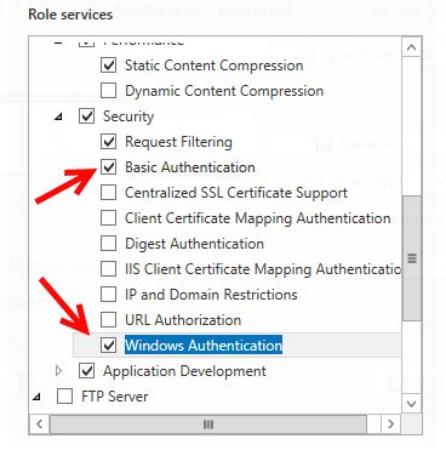

- IIS (where IIS role includes Basic Authentication, Windows Authentication, Non-HTTP Activation and HTTP Activation)
- Git
- Node.js
- IISNode
- Microsoft Visual Studio 2010 ADO.NET Entity Framework Tools
1) Node.js Installation
Download Node.js from http://nodejs.org/download/ and install it. You can download “Windows Installer (.msi)” 64-bit installer for Windows 2008 R2 server.
Now, simply open up Windows Explorer, navigate to “C:\Program Files\” and copy the folder called “nodejs”. After that, paste the folder into “C:\Program Files (x86)\” to avoid 32-bit/64-bit confusion.
2) Git Installation
You can install latest version of “msysgit” from http://code.google.com/p/msysgit/downloads/list . Double click on the setup file and complete the installation.

3) Installing IISNode
To do this, head over to the Github repository for IISNode and scroll down through the README file until you see “Installing for IIS 7.x/8.x”. Select x64 from the provided links. “https://github.com/tjanczuk/iisnode”

Once the downloading is completed, you can simply double click on the installer (.exe) and proceed with IISNode installation. There is no custom setup or configuration required for this.
Now you have successfully completed Node.js’s installation. You can verify whether it is installed correctly or not, by creating a test Node.js site.
Follow these steps to check this.
1) Make sure you have “Default Web Site” in your IIS, if not create it from IIS by right clicking on the Site > Create a new Site.

2) From the administrative command prompt, run this command.
++++++++++++++++

%programfiles%\iisnode\setupsamples.bat

+++++++++++++++++

C:\>cd “Program Files”iisnode

The system cannot find the path specified.

C:\>cd “Program Files\iisnode”

C:\Program Files\iisnode>setupsamples.bat

Installation of Node.js samples for IIS 7

This script must be run with administrative privileges.
This installer will perform the following tasks:
- ensure that the IIS_IUSRS group has read and write rights to “C:\Program Files\iisnode\www”
- delete the “Default Web Site/node” web application if it exists
- add a new site “Default Web Site/node” to IIS with physical path pointing to “C:\Program Files\iisnode\www”
This script does not provide means to revert these actions. If something fails in the middle…. well, although I hate sounding negative; you are on your own.
Press ENTER to continue or Ctrl-C to terminate.

Press any key to continue . . .

Ensuring IIS_IUSRS group has full permissions for “C:\Program Files\iisnode\www”

…

processed file: C:\Program Files\iisnode\www

Successfully processed 1 files; Failed processing 0 files

…success

Ensuring the “Default Web Site/node” is removed if it exists…

ERROR ( message:Must use exact identifier for APP object with verb DELETE. )

…success

Creating IIS site “Default Web Site/node” with node.js samples…

APP object “Default Web Site/node” added

VDIR object “Default Web Site/node” added

…success

INSTALLATION SUCCESSFUL. Check out the samples at http://localhost/node.

Press any key to continue . . .

C:\Program Files\iisnode>
Now, you can see that the new sub-site has been added under the “Default Web Site”.
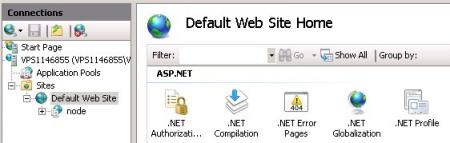
To verify this, go the “http://localhost/node/”
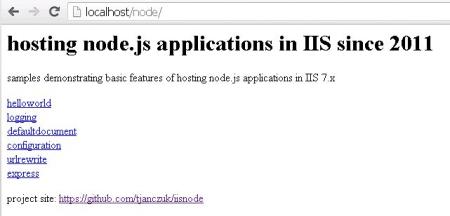
Now, Node.js is functioning with “Default Web Site”. Let me tell you how I configured this for live a site.
First, I tried to create a site via “setupsamples.bat” command but got some errors.
So, I made changes in the script and created a site from the command prompt. You can also edit the script according your requirement. It is located under the “C:\Program Files\iisnode” directory.
=======================>>>

processed file: C:\Program Files\iisnode\www

Successfully processed 1 files; Failed processing 0 files

…success

Creating IIS site “chetan123.com” with node.js samples…

SITE object “chetan123.com” added

APP object “chetan123.com/” added

VDIR object “chetan123.com/” added

…success

INSTALLATION SUCCESSFUL. Check out the samples at http://chetam123.com.#

=======================>>>
You can simply create a new site from the IIS control panel and use the Node.js (I have created a new site only for testing purposes).
I have used this code for default index page (default.js).
=======================>>>
var http = require('http');
http.createServer(function (req, res) {
res.writeHead(200, {'Content-Type': 'text/html'});
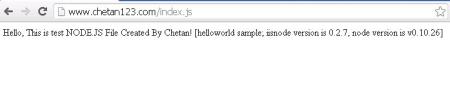
res.end('Hello, This is test Node.Js File Created by Chetan! [helloworld sample; iisnode version is '
+ process.env.IISNODE_VERSION + ', node version is ' + process.version + ']');
}).listen(process.env.PORT);
=======================>>>
Note that, you have to add “IISNode” module and handler setting in your domain’s Web.config flle for Node.js to work properly. If you have configured your Web.config file correctly, then you will see the index.js file’s code when you access the file on the browser.
To run the index.js file I have added these codes in the Web.config file.
=======================>>>

<configuration>

<system.webServer>

<handlers>

<add name="iisnode" path="index.js" verb="*" modules="iisnode" />

</handlers>

<defaultDocument>

<files>

<add value="index.js" />

</files>

</defaultDocument>

</system.webServer>

</configuration>

=======================>>>
By accessing this domain “http://chetan123.com” on the browser, you will be able to verify whether all these settings are working perfectly or not.
Troubleshooting:
These are two errors which I got while configuring Node.js in my server.
- iisnode encountered an error when processing the request.
HRESULT: 0×2
HTTP status: 500
HTTP reason: Internal Server Error
You are receiving this HTTP 200 response because system.webServer/iisnode/@devErrorsEnabled configuration setting is ‘true’.
In addition to the log of stdout and stderr of the node.exe process, consider using debugging and ETW traces to further diagnose the problem.
The node.exe process has not written any information to stderr or iisnode was unable to capture this information. Frequent reason is that the iisnode module is unable to create a log file to capture stdout and stderr output from node.exe. Please check that the identity of the IIS application pool running the node.js application has read and write access permissions to the directory on the server where the node.js application is located. Alternatively you can disable logging by setting.
Fix:
This error simply can be fixed by granting write access on domain’s home directory for “IIS_USER”.
- The iisnode module is unable to start the node.exe process. Make sure the node.exe executable is available at the location specified in the system.webServer/iisnode/@nodeProcessCommandLine element of web.config. By default node.exe is expected in one of the directories listed in the PATH environment variable.
Fix:
There are two ways to fix this issue,
A) Change the Application pool to 32 bit
B) Created a symbolic link from the 32-bit path to the 64-bit one by this command.
===============>>>

mklink /D "C:\Program Files (x86)\nodejs" "C:\Program Files\nodejs"

===============>>>
I am pretty sure with the help of this article you will be able to accomplish the successful installation of Node.js on any Windows 2008 R2 server. Good luck!
About the Author:


